Page 2 of 7
Re: Outside Clay Oven
Posted: Sat May 12, 2012 11:51 am
by C4tch
Brilliant! Totally impressed

C
Re: Outside Clay Oven
Posted: Sat May 12, 2012 1:52 pm
by pseudonym
Thanks for the update.
All around yours for a first firing and celebration meal then?

Re: Outside Clay Oven
Posted: Sat May 12, 2012 7:55 pm
by preppingsu
Good weather today so we were able to move on with the clay oven.
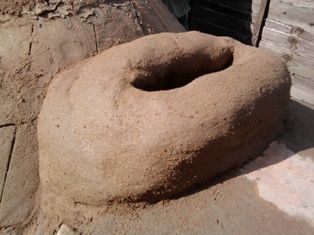
First we needed to build a mould to be able to build the brick archway. This used 2 bags of sand.
- ooo.jpg (21.64 KiB) Viewed 14957 times
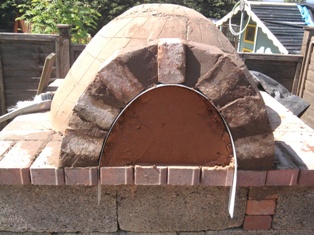
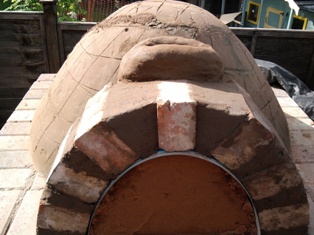
Then using cement and some reclaimed bricks we began to build. Now, I'm sure that there must be some mathematics involved in building an archway but we did it by eye. This is our second attempt.
- Photo0328.jpg (48.58 KiB) Viewed 14957 times
Not too bad. Fingers crossed it all stays where it should. We left it for about an hour or so and it was dry enough to start building the chimney. This is to draw the smoke out of the oven, rather then getting a facefull of smoke when you are cooking. We have seen some without a chimney.
We will need to build it higher but we will take it in stages.
- Photo0340.jpg (42.57 KiB) Viewed 14957 times
- Photo0341.jpg (42.32 KiB) Viewed 14957 times
We ran out of time to start the next layer (insulation layer) so we will do that tomorrow.
No cost to todays work, as we already had the sand. The cement was left over from the plinth and the clay is out of the garden
Re: Outside Clay Oven
Posted: Sat May 12, 2012 9:22 pm
by i_am_jim
that looks cool, very inspirational. can't wait to see it finished.
Re: Outside Clay Oven
Posted: Sat May 26, 2012 8:27 pm
by preppingsu
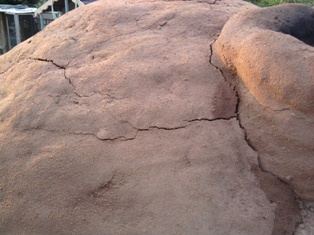
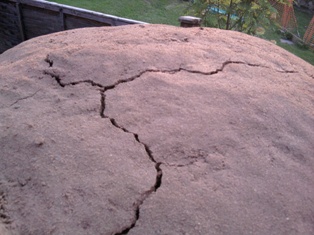
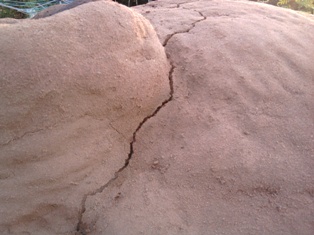
A few days after completing the second layer we decided to light a fire just to see how it went, were there any cracks inside and to help it dry out. Oops, big mistake. We were expecting some cracks but these were the grand canyon of all cracks!
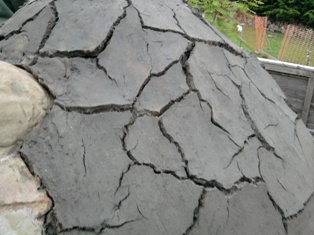
- Photo0361.jpg (40.39 KiB) Viewed 14943 times
- Photo0362.jpg (37.81 KiB) Viewed 14943 times
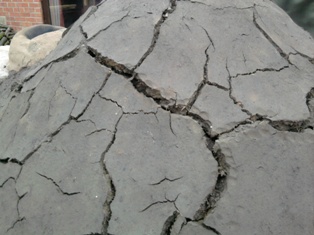
So we then had to fill the cracks, which then cracked so we had to fill a bit more!

- Photo0366.jpg (41.03 KiB) Viewed 14943 times
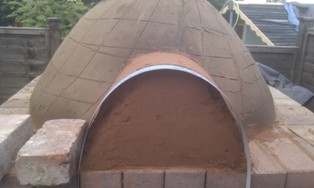
So today it was ready to take the final layer. This was the same mix as the original layer (2:1 sand :clay) and puddled.
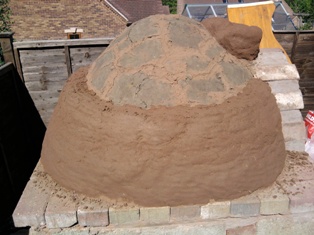
- Photo0368.jpg (39.94 KiB) Viewed 14943 times
We added some height to the chimney as well to hopefully provide a better draw. We'll see how it works and we can always make it taller.
- Photo0370.jpg (44.21 KiB) Viewed 14943 times

- Photo0371.jpg (42.86 KiB) Viewed 14943 times
Todays layer needed 7 bags of sand and 3.5 bags of clay. No cost today (this sand came out of the dome - see previous posts)
We still have half a bag of sand left from the dome.
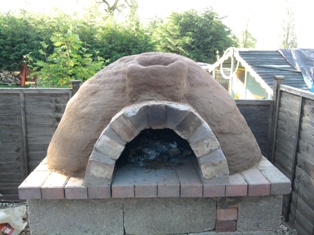
I'm pretty pleased with how its turned out. Tomorrow we will light the fire again and have a go at pizza cooking.

Jobs to do: pointing in the leading brickwork,
door and chimney plug ( to seal the heat in for overnight cooking)
shingles to clad the sides of the plinth (a little project for OH to do to practise green woodworking skills)
more permanent roof
Re: Outside Clay Oven
Posted: Sun May 27, 2012 7:54 pm
by preppingsu
We did our first cook in the fire tonight. This is a learning curve and I hope to practise most nights during half term with different foods, bread etc.
I lit the fire at 4pm, as it is suggested that you need a couple of hours to get a good temperature. Now, I haven't got an oven thermometer so it was a case putting my hand in to see how hot it was!
This was the fire after about an hour.
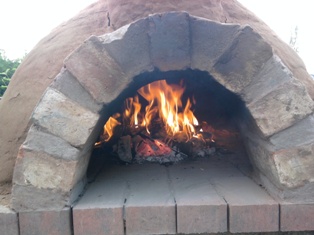
- Photo0377.jpg (35.73 KiB) Viewed 14933 times
At 6pm I stopped adding wood as I wanted to cook about 6.20pm. A recommended test was to throw a little flour onto the bricks and if it turned golden brown the temp was right for cooking. I did that and the flour turned brown.
I pushed the embers to the back of the oven leaving space for the pizzas.
In went the first one.
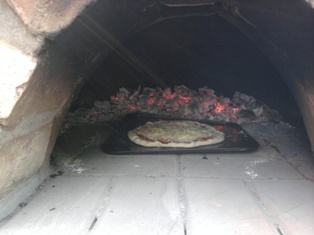
- Photo0378.jpg (29.09 KiB) Viewed 14933 times
A few minustes later and the cheese was starting to bubble.
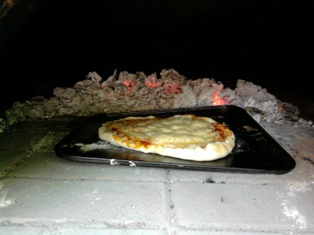
- Photo0380.jpg (30.97 KiB) Viewed 14933 times
And the final product, which was well received. (A basic cheese pizza as today was a trial to see how it all cooked) It took 5mins.
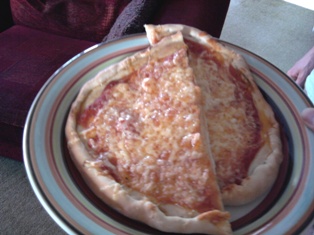
- Photo0379.jpg (40.62 KiB) Viewed 14933 times
I wanted to cook three, which I did seperately. As I didn't add any more wood to the fire the 2nd and 3rd took just a couple of minutes longer. If I wanted to cook more pizzas I would need to keep the fire going to keep the temp up. Something to practise.
At 8pm the heat was still intense, we couldn't put our hands in there for too long and the bricks were too hot to touch. This bodes well for continued cooking for bread etc.
We have had a few cracks appear, again to be expected. Easy enough to fill as they are just superficial
- Photo0381.jpg (41.63 KiB) Viewed 14933 times
- Photo0382.jpg (41.75 KiB) Viewed 14933 times
- Photo0383.jpg (37.75 KiB) Viewed 14933 times
Re: Outside Clay Oven
Posted: Sun May 27, 2012 10:32 pm
by Rosesandtea
Very impressive! Thank you for your posts and pictures!
Re: Outside Clay Oven
Posted: Sun May 27, 2012 11:11 pm
by Mr_Sea-Breeze
Awesome
Thank you for taking the time and effort to document the process so well (cracks and all!)
Cheers
MSB
Re: Outside Clay Oven
Posted: Mon May 28, 2012 7:42 am
by pseudonym
Fantastic, and those pizzas look lovely.
Re: Outside Clay Oven
Posted: Mon May 28, 2012 8:29 am
by i_am_jim
looks really good. i'm very tempted to try building one myself. thanks for posting.